Sunday, July 6, 2014

It's another study week before final exam. And, instead of make a preparation for exam, I travel back to my hometown and spend time baking everyday! Happiest days in my life! It really is a very short holiday, so I tried to find easy recipes and I found this yummy cookie recipe! 

We call this cookie putri salju in Indonesia, a melt-in-your-mouth type of cookie and ground cashew nuts in it. Well, the texture is similar to melting moment cookies, so I guess it is the same (minus the cashew nuts). This recipe contains no nuts, but we add in cocoa powder and dark cooking chocolate instead.

The cookies texture is crunchy and melt in your mouth, although I expect it to be softer just like the original putri salju cookies. The taste is super chocolate, it is bittersweet and that's what I love the most from chocolate! I even think that I might bake this for next year's CNY!


Chocolate Melting Moments Cookies - Putri Salju Cokelat (translated to english)
Source: Majalah Sedap ed. 9/IX/2008 via Dapur Vanilla

Ingredients :
120 gr butter
180 gr margarine
150 gr powdered sugar
150 gr dark cooking chocolate, melted
1 large egg
500 gr cake flour*
50 gr cocoa powder*
1 tsp baking powder*
*Sift together

Coating :
Powdered sugar

Method :
1. Beat butter, margarine, and powdered sugar for 30 seconds. Add melted dark cooking chocolate, mix well. Add egg, mix well.
2. Add sifted flour, cocoa powder, and baking powder, mix well.
3. Roll the dough to 1/2 cm thickness, cut with cookies cutter. Arrange on greased baking tray.
4. Bake at 160C for 20 minutes.
5. Coat with powdered sugar while still warm.

Enjoy ♥

With love,
Julia ♥

Monday, March 31, 2014

Last week I came back to Malaysia and have to resist the urge to bake again until August! Anyway, I still have some recipe that I haven't posted yet. I'm lazy, I know. 


I'm so happy to introduce you to another pretty and amazing site that I absolutely love so much, Raspberri Cupcakes by Steph. She has the cutest macarons that I've ever seen and lovely pictures. I think I don't have to explain more, just visit her site and experience the beauty!


This is one of her recipe and it tastes so good! Somehow I can't really taste the tea flavor, maybe I'll add more leaves in it next time. Anyway, I always love cupcake with lemon icing. ♥


Black Tea Cupcakes with Lemon Icing (translated to indonesian)
Source : Raspberri Cupcakes by Steph

Bahan :
3 bag teh hitam (atau 3 sdt daun teh kering)
250 ml susu
155 gr gula kastor (saya pakai gula pasir)
125 gr mentega, suhu ruang
2 butir telur, suhu ruang
1 sdm madu
350 gr tepung serbaguna
4 sdt baking powder
1 sdt garam

Cara :
1. Panaskan oven pada suhu 180C dan susun kertas cupcake di dalam 12 loyang cupcake. 
2. Keluarkan daun teh dari kantongnya, masukkan ke dalam panci bersama susu, dan panaskan hingga hampir mendidih, aduk terus. Biarkan dingin. Daun teh dapat disaring, tapi saya pakai setengah dari daun teh supaya aromanya lebih kuat.
3. Mixer mentega dan gula dengan kecepatan tinggi hingga mengembang dan pucat, paling sedikit 5 menit.

4. Masukkan telur satu per satu, aduh hingga rata. 
5. Dengan mixer kecepatan rendah, masukkan madu dan 1/3 bagian tepung. Kemudian masukkan 1/2 bagian campuran susu, 1/3 bagian tepung, lalu sisa susu dan tepung. Mizer hingga rata.
6. Masukkan adonan ke dalam loyang cupcake hingga 2/3 penuh dan panggang selama 15-20 menit. Biarkan kue di dalam loyang selama 5 menit, kemudian keluarkan dari loyang dan biarkan sampai dingin.

Enjoy ♥

With love,
Julia ♥

Friday, March 21, 2014

Grandma's 69th Birthday

I was so excited that I have an opportunity to make another birthday cake again! This time is for my grandma's 69th birthday. I decided to decorated it with fruit because somehow it looks healthier and of course so so pretty! It also helped me to cover up all of the not-so-good buttercream layer on top. It is quite hard for me to create a really smooth surface, so I make basketweave pattern instead. I admit that it is actually easier than it looks!


For the cake, I use steamed black glutinous rice cake that I have posted here. The cream cheese filling really gives an extra flavor to the gorgeous cake!


With love,
Julia ♥

Thursday, February 27, 2014

Lattice Crust Apple Pie


I'm in love with lattice these days, I can spend whole day just doing it! It looks super cute and tempting at the same time. I learn how to do it from a video tutorial by Howdini. 


Recently I join Your Kitchen-My Kitchen (YKMK) group in Facebook and they have a valentine theme challenge. All of them look so pretty and I encourage myself to join too, this is my first challenge! I baked lots of cakes these day and thinking of something different. So here it is, lattice crust apple pie topped with a heart, I add a little bit of strawberry jam to enhance the color and sprinkle them with powdered sugar. Dad ate 2 pieces of this! xD


Apple Pie (translated to Indonesian)
Adapted from Joy of Baking with modification


Bahan Kulit :
350 gr tepung serbaguna
1 sdt garam
30 gr gula pasir (jika mencampur dgn food processor) atau gula halus (jika mencampur manual dgn tangan)
226 gr mentega tawar atau shortening, dingin, dan potong kotak sebesar 2.5 cm
60 - 120 ml air es

Kuning telur utuk olesan

Bahan isian :
1.1 kg apel (sekitar 6 buah apel ukuran medium), kupas, buang bijinya, iris setebal 1/2 cm
50 gr gula pasir
55 gr gula palem
1 sdm air lemon
1 sdt kayu manis bubuk
1/4 sdt pala bubuk
1/4 sdt garam
2 sdm mentega tawar
1 1/2 tablespoons tepung maizena

Cara membuat kulit:
1. Campurkan tepung, garam, gula, dan mentega dengan food processor. (Jika tidak ada food processor, campur dengan tangan). Campuran akan berpasir pasir.
2. Tuang 60 ml air sedikit demi sedikit sambil terus dicampur hingga adonan menyatu ketika ditekan. Apabila masih terlalu kering, campurkan air sedikit.
3. Bagi adonan menjadi 2, bentuk bulat dan tutup dengan plastik. Dinginkan di kulkas sekitar 1 jam.
4. Setelah 1 jam, keluarkan 1 bagian adonan dan letakkan di permukaan yang telah ditaburi sedikit tepung. Gilas adonan setebal 1/2 cm, kemudian masukkan ke dalam cetakan pie. Tutup dengan plastik dan dinginkan di kulkas.
5. Keluarkan adonan yang kedua dan gilas setebal 1/2 cm. Potong potong menjadi strip panjang dengan lebar 0,75 cm. Tutup dengan plastik dan dinginkan kembali di kulkas.

Cara membuat bahan isian:
1. Dalam wadah besar, campur apel dengan gula,air lemon, kayu manis bubuk, pala bubuk, dan garam. Diamkan pada suhu ruang paling cepat 30 menit atau hingga 3 jam.
2. Kemudian, siapkan saringan di atas wadah besar. letakkan apple dan airnya di atas saringan tersebut. Diamkan lagi selama 15-30 menit atau sampai air apel mencapai 120 ml.
3. Tuang air apel dalam wadah microwaveable, masukkan 2 sdm mentega. Panaskan dalam microwave hingga mendidih dan kental, pada suhu tinggi sekitar 5-7 menit, atau hingga air apel berkurang menjadi 80 ml.
4. Masukkan apel dalam wadah besar, masukkan tepung maizena, aduk rata.
5. Tuangkan air apel ke dalam apel, aduk rata.

Apple pie:
1. Tuang apel di atas bahan kulit.
2. Rangkai anyaman di atasnya dengan strips yang telah dipotong. Video tutorial dari Howdini dapat dilihat di sini.
3. Tutup dengan plastik dan dinginkan di kulkas sambil menunggu oven dipanaskan.
4. Panaskan oven 220 derajat C.
5. Setelah 15 menit, keluarkan apple pie, oles atasnya dengan kuning telur, dan panggang selama 45-55 menit. Simpan pada suhu ruang selama 2-3 hari.

Enjoy ♥

With love,
Julia ♥

Sunday, February 23, 2014

Pineapple Lattice Tart

This is my very first time trying lattice tart and it's actually not hard at all! I am falling in love with the way it looks, so adorable and sweet. ♥


So far I have made lattice tart crust twice, once with shortening and once with butter. The one with butter tastes so good and smells awesome, however it is not as pliable and flaky as the one with shortening. I like the one with shortening, super super easy to handle no matter how you turn it around and the texture is sooo gorgeous! I really suggest you to try that one, you can find the recipe here. ;)


The taste is similar to pineapple tart, but I admit that I prefer pineapple tart more because I can really taste the butter. But seriously, it is just so easy to make, a different way to enjoy your pineapple tart, great as a gift, and everyone will fall in love with the lattice pattern!


Pineapple Lattice Tart (translated to indonesian)
Source : WendyinKK


Bahan :
300 gr tepung terigu serbaguna
175 gr mentega asin beku (tambahkan garam secukupnya kalau pakai mentega tawar)
1 sdm gula bubuk
50 gr whipping cream (saya pakai susu secukupnya)
Isian nanas (lihat resep di bawah, siapkan terlebih dahulu)
1 kuning telur untuk olesan

Cara :
1. 1. Campurkan tepung, gula, dan mentega dengan food processor. (Jika tidak ada food processor, campur dengan tangan). Campuran akan berpasir pasir.
2. Tuang whipping cream sedikit demi sedikit sambil terus dicampur hingga adonan menyatu ketika ditekan.
3. Bentuk bulat dan tutup dengan plastik. Dinginkan di kulkas sekitar 1 jam.
4. Setelah 1 jam, letakkan di permukaan yang telah ditaburi sedikit tepung. Gilas adonan hingga diameter 12 inci (30 cm), kemudian masukkan ke dalam cetakan pie. Potong tepiannya hingga rapi.
5. Gilas sisa adonan bentuk persegi ukuran 9x5 inci (23x12 cm),  tutup dengan plastik dan dinginkan di kulkas selama 10 menit. Dinginkan juga kulit tart di dalam loyang.
6. Panaskan oven dengan suhu 200C.
7. Keluarkan sisa adonan dan potong memanjang ukuran 9x0,5 inci (23x1,3 cm).
8. Masukkan isian nanas di atas kulit tart dan ratakan.
9. Bentuk anyaman dengan potongan potongan yang telah dibuat, rapikan.
10. Oles permukaannya dengan kuning telur.
11. Panggang di rak paling bawah selama 40-45 menit.

Isian nanas (siapkan sebelum membuat adonan tart) :
600 gr nanas
120 gr gula pasir
2 inci (5 cm) kayu manis
3 cengkeh (saya tidak pakai)
1 sdm tepung maizena

1. Potong nanas menjadi kecil kecil.
2. Letakkan di panci bersama gula, kayu manis, dan cengkeh. Diamkan selama 10 menit hingga nanas mulai mengeluarkan sarinya.
3. Dengan api sedang, masak hingga nanas terasa lembut, tapi tidak hancur. Pisahkan kayu manis dan cengkeh.
4. Hancurkan nanas.
5. Masukkan tepung maizena, masak dengan api sedang hingga mengental.
6. Biarkan dingin sebelum digunakan.

Enjoy ♥

With love,
Julia ♥

Sunday, February 16, 2014

I still remember last time about 4 or 5 years ago when I realized that I love baking so much. I started to go to the book recipe section whenever I went to a bookstore and I would be tremendously happy just by looking at it! 

This is one of recipe that I keep since last time and I just found it recently in the cabinet. I know I just have to try it out! The brownies is so moist and wonderful with the cream cheese on top. Too bad I did not have any cashews on hand and it lost it's wonderful nutty flavor and crunch. 


Source : Cheese & Fruit Brownies by Indriani

I am not really sure if I can share recipes from a book online, so maybe email me and I'll send it to you. ;)


With love,
Julia ♥

Saturday, February 15, 2014

Who doesn't like sweet potato? It's so sweet, flavorful, and healthy snack! 

Okay, I know I like ALL the things that can be eaten. Sometimes my friends won't even believe me when I say "Oh, it's so delicious!", and they will be like "I doubt your palate, really". The good thing is I'm not a picky eater, take me for a meal anywhere you like and I'll still enjoy it! 

Dad bought lots of sweet potatoes recently. We usually steam and eat it with sprinkles of granulated white sugar or some honey. I prefer honey, I think I eat the honey more than the sweet potatoes.


Anyway, sometimes it's kind of boring to eat it just like that, so I tried to browse some easy recipes for sweet potatoes. I couldn't find many easy recipes and decided to try this one, the savory one. I just imagine theatit will be so amazingly sweet from the honey with wonderful cinnamon fragrance, and it was! Moreover, it is very easy to make, you just have to toss everything together and bake it the oven. It's perfect for snack, I couldn't stop eating!


Roasted Sweet Potatoes with Honey and Cinnamon (Ubi Manis Panggang dengan Madu dan Kayu Manis)
Source : Tyler Florence (translated to Indonesian)

Bahan :
4 buah ubi manis ukuran sedang, kupas dan potong kotak ukuran 1 inchi
60 ml extra-virgin olive oil
60 ml madu
2 sdt bubuk kayumanis
Garam dan merica secukupnya

Cara :
1. Panaskan oven pada suhu 190 derajat C.
2. Susun ubi manis di atas loyang. Taburkan minyak, madu, kayu manis, garam, dan merica di atasnya. Panggang selama 25-30 menit atau hingga ubi lembut.

Enjoy ♥

With love,
Julia ♥

Thursday, February 13, 2014

Banana Bread

Dad bought me lots of bananas again~

When there are bananas at home, I will always leave it until darken and use it to try out some banana cake recipes. But that day was different. Mom asked me to bake some bread again, so my brother can bring it to school as snacks. I quickly open our family's favorite bread recipe from Keluarga Nugraha's website and also find some inspiration for the bread's shape. Of course I can't make round buns forever! :D


I found a very good inspiration from Citra Kusuma's blog. She also provides a step-by-step picture in shaping the dough! Love it so much! ♥

Banana Bread


Bun ingredients (adapted from Keluarga Nugraha) :
375 gr bread flour, sifted
75 gr castor sugar
20 gr milk powder
8 gr instant yeast
1/2 tsp salt
125 gr unsalted butter, softened, room temperature
Evaporated milk, for brushing dough (about 4 tbsp)

Mix well (egg mixture) :
1 egg yolk, lightly beaten
1 whole egg, lightly beaten
175 ml cold milk
2 tbsp condensed milk

Enough bananas for filling, and cheese for topping

Method :
1. In a big bowl,mix together flour, castor sugar, milk powder, yeast, and salt.
2. Pour egg mixture little by little, knead to combine.
3. Add softened butter, knead until dough is smooth, soft, and elastic.
4. Cover the bowl with plastic wrap and let dough proof for 30 mins until dough has doubled in volume.
5. Deflate dough using the heel of your hand, and divide into about 50 gr balls.
6. Let rest for 30 mins until dough puffed up.
7. Flatten dough to 1 cm thick and filled with half banana (click here for Citra Kusuma's step-by-step picture), and place on a parchment lined baking sheet.
8. Cover with plastic wrap and let rest for 15 mins. Preheat oven to 180°C.
9. Brush the dough surface with evaporated milk and bake for 30 minutes.

Enjoy ♥

With love,
Julia ♥

Wednesday, February 12, 2014

Cheesy Chiffon Cupcakes

Today I want to introduce you another cool blog, Hesti's Kitchen by Hesti HH.! I went through all her posts and love it so much and pin them on Pinterest and bookmark them on my to-do list. I admire her beautiful pictures and clear, easy to follow instruction. It really encourages me to learn more about photography, props, editing, and all.

One of the recipe that I tried is this Cheesy Chiffon Cupcakes. I think I have mentioned before that my family is a fan of light, airy cake, so I think they will absolutely love this! And the result is superb! I use cream cheese frosting on top and decorate it with cheese, or you can simply sift powdered sugar on it. The thing that I love the most is the cheddar cheese inside, yes of course because I love cheese so so bad and enjoy chewing it. N even said that this is so far the best cake he has ever tried! Now I know he is a fan too. xD


Look how I tried to take picture on the inside part, it's not so clear but you can see the yummy cheese cubes! Isn't it just so tempting? ♥


Please try out the recipe, you'll love it! You can check the recipe by clicking on the link below :D
Source : Kitchen Corner (English) via Hesti's Kitchen (Indonesian)

Enjoy ;)

With love,
Julia ♥

Monday, January 27, 2014

Hello sweet cookies! ♥

My love to peanut butter is severe. I can lick spoonfuls of peanut butter just like that! As many people say, peanut butter is good for your health but still, too much is less. Anyway, I still love you, peanut butter.

Despite my fondness, I have never bake peanut butter cookies before. I have mentioned before that my family prefers crunchy cookies, so I think this cookies will not be a good idea. But really, how can I bear with the cuteness of this cookies?


I actually change some of the ingredients, so I am sure that the result is not as good as the original recipe. I used margarine instead of shortening and my honey was very thin, making the dough soggy. The taste is as expected, soft and chewy cookies full of peanut taste. My family loves the smell but not the texture, so I think I might make it again only if I crave for light soft cookies. But if you are a fan of soft cookies, this recipe is worth trying!

Honey-Peanut Butter Cookies (translated to Indonesian)
Sumber : My Baking Addiction
Membuat 36 buah

Bahan :
113 gr shortening
250 gr selai kacang
240 ml madu
2 btr telur ukuran besar, aduk rata
2 sdt vanilla extract
375 gr tepung serbaguna
200 gr gula
1 1/2 sdt baking soda
1 sdt baking powder
1/2 sdt garam

Cara :
1. Panaskan oven 175 derajat celcius, alas loyang kue kering dengan kertas roti.
2. Mixer shortening, selai kacang, dan madu dengan kecepatan sedang hingga rata dan mengembang - sekitar 3 menit.
3. Masukkan telur dan vanilla, aduk rata.
4. Campur rata tepung, gula, baking soda, baking powder dan garam. Masukkan campuran tersebut ke campuran selai kacang sedikit demi sedikit sambil diaduk dengan kecepatan rendah.
5. Bentuk bola berukuran 2 sdm, susun di atas loyang. Ratakan dengan garpu. Panggang selama 10-12 menit. Kue kering dapat disimpan di dalam wadah kedap udara pada suhu ruang selama 3 hari.

Enjoy ;)

With love,
Julia ♥

Sunday, January 26, 2014

Lemon Chiffon Cake

3 months holiday is always amazing! I will be having my holiday until the end of March and I don't want it to pass too fast.. My last semester will be started in April, submit the dissertation, then internship, and graduation in 2015! Oh, how time flies so fast.

Since this holiday started, I bake every single day. Yess! Every. Single. Day. I did not take picture all the time though, finding perfect lighting and also mood is not easy, so I end up with only a few pictures.

Chinese New Year is cominnggggg~ I spent this last 2 weeks preparing cookies, although me and my family will not be here for the first few days of CNY. We are going to Kuala Lumpur to spend CNY together with my younger sister, can't wait to bring my cookies for her!

Actually I baked this Lemon Chiffon Cake during last holiday in August, but I only managed to post in today. I had a wonderful time during last holiday and forgot to post it in this blog! *innocent face*

This chiffon cake is lovely! My family is a fan of soft, airy, not too sweet cake and this one is a favorite. I also love the lemony flavor from the cake. ♥

Lemon Chiffon Cake
Source : allrecipes.com


Ingredients:

    210  gr      cake flour    (I use 158 gr all-purpose flour + 52 gr cornstarch)
    1      tbsp  baking powder
    1      tsp    salt
    100  gr     white sugar
    120  ml     vegetable oil
    6               egg yolks
    180  ml     water
    1      tbsp  lemon zest
    6              egg whites
    1/2   tsp    cream of tartar
    150  gr     white sugar

Frosting : Mix well 115 gr powdered sugar and 2-4 tbsp lemon juice.

Method :


  1. Preheat oven to 175 degrees C.
  2. In a large bowl, combine flour, baking powder, salt, and 100 gr sugar. Add oil, egg yolks, water and lemon zest. Beat with an electric mixer until smooth.
  3. In a small bowl, beat egg whites and cream of tartar until peaks form. Gradually add 150 gr sugar, and beat until very stiff and shiny peaks form. Fold 1/3 of the whites into the batter, then quickly fold in remaining whites until no streaks remain. Turn batter into ungreased 10-inch tube pan.
  4. Bake at 175 degrees C for 60 minutes or until a toothpick inserted in the center comes out clean. Invert cake and cool completely in pan. When cool, loosen edges and shake pan to remove cake.
Enjoy ;)

With love,
Julia ♥

Friday, January 24, 2014

Creamy Coconut Cupcakes


Last Christmas I received wonderful muffin pans from my godmother. She's a very understanding lady and know me very well! I have been looking for muffin pans, so I called her to ask where I can find it in Selangor. I did not expect that she would give me muffin pans as Christmas gift and I was so exhilarated!

I wanted muffin pans so so bad after I saw some recipes on Pinterest. Yes, I never had muffin pans before and I bake them in mini tart pans like my chocolate chunk muffins and donut muffins. Still so adorable to see, but I wanted the REAL pan!

Actually I have baked a few cupcakes before I make this coconut cupcake, but some were eaten before I have chance to take picture and the rest were not really my family's favorite, so I don't bother to post it here. For this Creamy Coconut Cupcake, I think the combination of coconut and cream cheese is so unique and fabulous! What I love the most is the chewy shredded coconut inside. My family and friends loves it so much, that is why I think this recipe is a must to bake!


Creamy Coconut Cupcakes (translated to Indonesian)
Sumber : Ina Garten via The Baker Chick
Membuat : 12 buah


Bahan : 

Untuk cupcake:
170 gr mentega, suhu ruang
200 gr gula
3 butir telur ukuran besar, suhu ruang
1 sdt vanilla extract
188 gr tepung serbaguna
1/2 sdt baking powder
1/4 sdt baking soda
1/4 sdt garam
1/2 sdm cuka makan + 120 ml susu cair (diamkan selama 10menit) -> untuk bahan BUTTERMILK
120 gr kelapa parut manis

Untuk frosting:
227 gr cream cheese, suhu ruang
170 gr mentega, suhu ruang
1 sdt vanilla extract
500 gr gula halus (masukkan sedikit demi sedikit sesuai selera)
Kepala parut secukupnya untuk hiasan

Cara :

1. Panaskan oven dengan suhu 165 derajat celcius.
2. Dalam mangkuk besar, mixer mentega dan gula bersama hingga lembut, mengembang, dan putih (sekitar 5 menit). Masukkan telur satu per satu, aduk rata sebelum memasukkan telur yang berikutnya. Masukkan vanilla extract dan aduk hingga rata.
3. Dalam mangkuk terpisah, campur rata tepung, baking powder, baking soda, dan garam. Masukkan campuran tepung dan buttermilk bergantian sedikit demi sedikit. Campur hingga rata. Masukkan kelapa parut.
4. Siapkan loyang muffin dengan paper liner. Isi adonan hingga 3/4 penuh. Panggang selama 20-25 menit, hingga bagian atasnya keemasan dan tusuk gigi yang dimasukkan bersih. Biarkan dingin di loyang selama 5 menit, kemudian keluarkan dari loyang.

Membuat frosting:
Mixer mentega dan cream cheese hingga lembut, masukkan vanilla. Masukkan gula halus sedikit demi sedikit hingga lembut. Hias cupcake dengan frosting dan kepala parut.

Enjoy ♥

With love
Julia ♥

Sunday, January 12, 2014

Cornflakes Cookies


Seriously, I can't help myself to bake everyday! My hands feel extremely itchy if i just sit and do nothing. I love to be productive, feel so satisfied in the end of the day that I have learn something each day.

As I have restocked the baking ingredients at home yesterday, I am ready for another recipe! Yay! ♥

Chinese New Year is coming and I just can't wait! These few weeks before CNY, I have collected some recipes from my favorite blogs and webstites that I think will be easy to make and also yummy! One of the recipe is Rasa Malaysia's Cornflakes Cookies. It is a bit different from most of the cornflakes cookies in my place. In this recipe, she rolls the cookie dough into the cornflakes, whereas in our place, we usually mix the cornflakes with the batter together. And yes,  I love the look! For the taste, just make sure you use high quality butter because all the taste and smell depending on it, and your cookies will be wonderfully crunchy and buttery.

Cornflakes Cookies (translated to Indonesian)
Source : http://rasamalaysia.com/

Bahan :
200 gr mentega
150 gr gula pasir
1 sdt vanilla essence
2 btr telur (kocok hingga tercampur)
300 gr tepung serbaguna
30 gr tepung maizena
60 gr cornflakes (remukkan, jangan terlalu hancur, kira-kira pecah sampai 2-3 bagian sudah cukup)

Cara :
1. Kocok mentega dan gula sampai pucat dan lembut.
2. Masukkan vanilla essense dan telur, kocok rata.
3. Masukkan tepung dan maizena, aduk perlahan. (Adonan tidak menempel di tangan saat disentuh)
4. Ambil 1 sdt adonan, bentuk bulat dan gulingkan ke cornflakes. Susun di atas loyang yang dilapisi kertas roti dan panggang dengan suhu 175 derajat celcius selama 25 menit atau sampai kuning kecoklatan.

Enjoy ♥

With love
Julia ♥

Tuesday, December 31, 2013

My favorite website recently is Koleksi Resep Keluarga Nugraha. Her recipes are straight to the point, easy to follow, and the pictures are lovely! I think she's no longer update her website, I wish she will post recipes again someday...

I decided to bake this bun because Ms Nugraha stated that the milk filling will melt in your mouth! Ohh, how can I wait any longer to try? Me and my family loves these buns sooo much! I should say this bun is the softest bread that I ever made, it is so soft even on the second day, anddd the filling DOES melt in your mouth! My mom keep asking me to bake it again, definitely a keeper! ♥

Milk Filled Bun (Roti Isi Susu)
Source : Keluarga Nugraha (in Indonesian)
Make 25 buns


Bun ingredients :
375 gr bread flour, sifted
75 gr castor sugar
20 gr milk powder
8 gr instant yeast
1/2 tsp salt
125 gr unsalted butter, softened, room temperature
Evaporated milk, for brushing dough (about 4 tbsp)

Mix well (egg mixture) :
1 egg yolk, lightly beaten
1 whole egg, lightly beaten
175 ml cold milk
2 tbsp condensed milk

Filling ingredients, mix well :
150 gr unsalted butter
30 gr powdered sugar
75 gr milk powder

Method :
1. In a big bowl,mix together flour, castor sugar, milk powder, yeast, and salt.
2. Pour egg mixture little by little, knead to combine.
3. Add softened butter, knead until dough is smooth, soft, and elastic.
4. Cover the bowl with plastic wrap and let dough proof for 30 mins until dough has doubled in volume.
5. Deflate dough using the heel of your hand, and divide into 30 gr balls.
6. Let rest for 30 mins until dough puffed up.
7. Flatten dough to 1 cm thick and filled with about 1 tsp filling, roll into tight balls and place on a parchment lined baking sheet.
8. Cover with plastic wrap and let rest for 15 mins. Preheat oven to 180°C.
9. Brush the dough surface with evaporated milk and bake for 30 minutes.

Enjoy ♥

With love,
Julia ♥

Saturday, August 10, 2013

Hello sweethearts! ♥

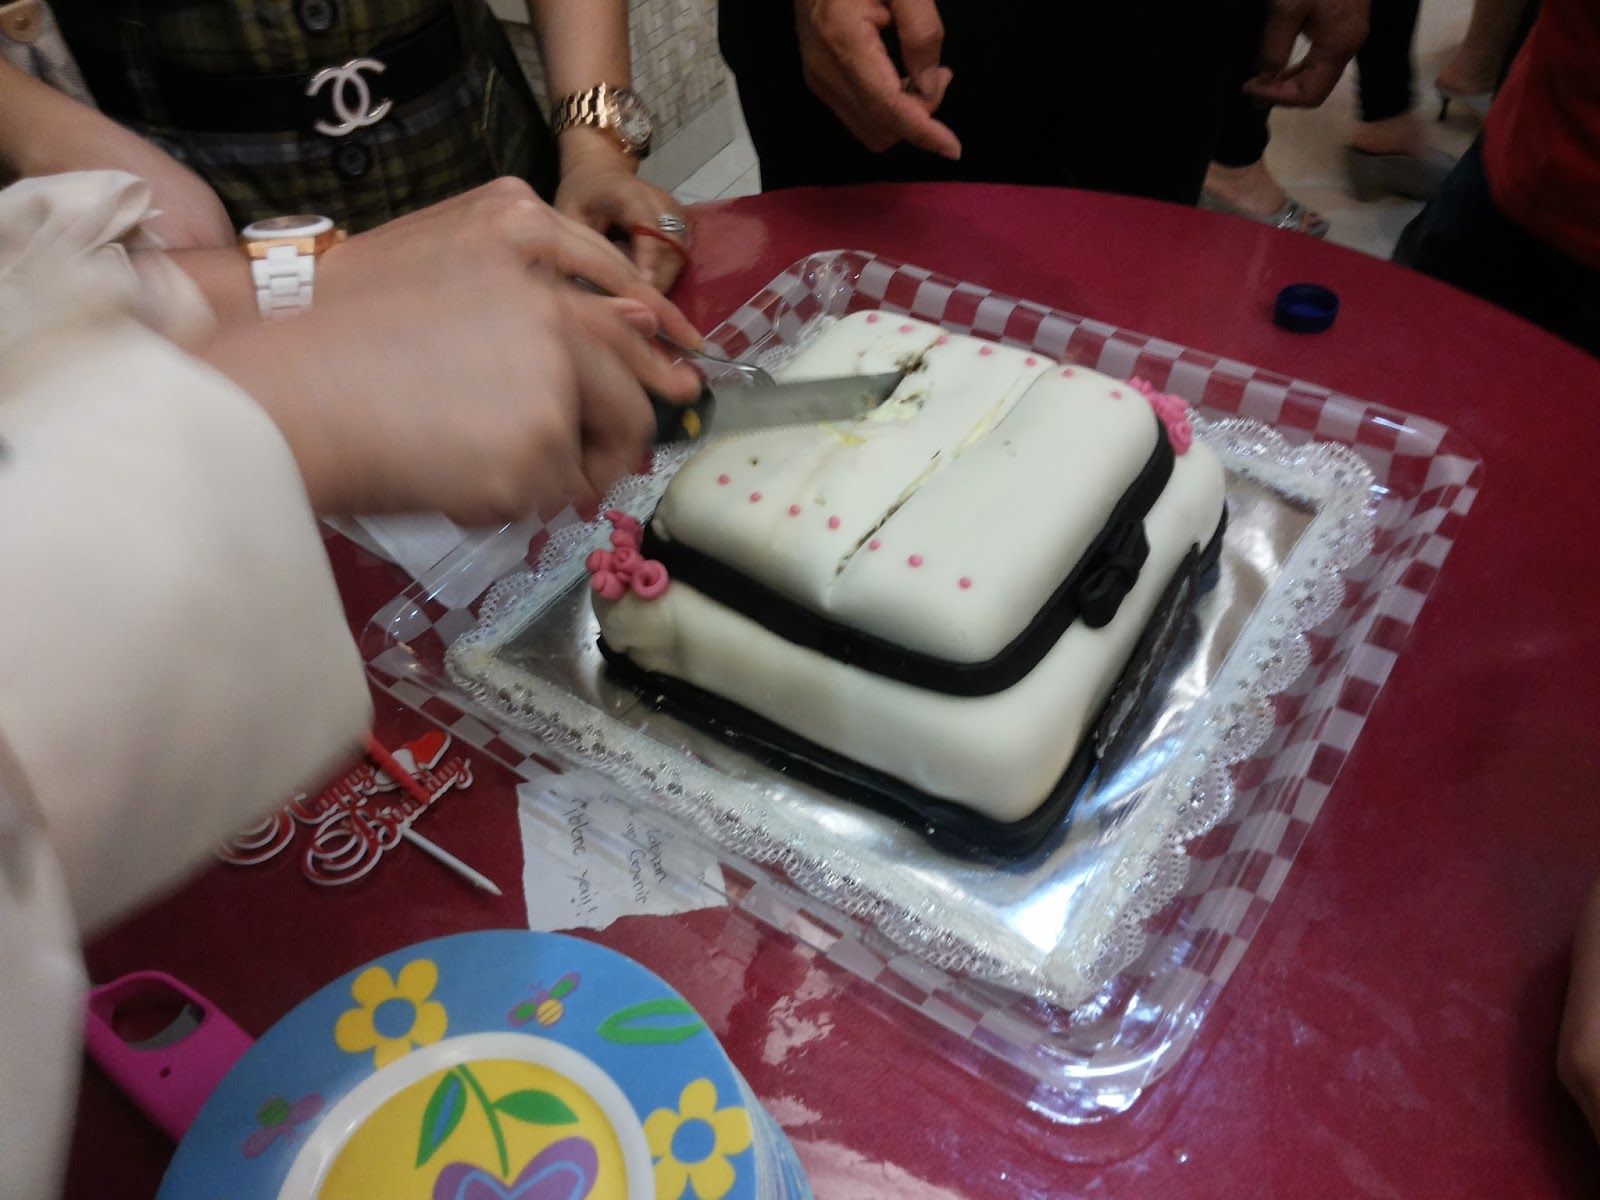
Several days ago is my dad and little brother's birthday. 

Okay. He's not little anymore.

He is 13 years old this year, but still he is my sweet little brother. They are the only guys in the house and share the same birthday, isn't it sweet? I always think so! ♥

So for the very first time, I baked a birthday cake! Yay!

For both layer, I baked carrot cake with cream cheese frosting. I forgot to take picture of the inside part due to the nervousness while making this. Hahaha. 


For the white fondant, I use marshmallow fondant recipe that I found online and the black fondant is store-bought. Marshmallow fondant is actually too sweet for me (although I am a sweet tooth person) and the store-bought fondant tastes quite nice! I think next time I will just buy ready-to-use fondant.


I put a few drops of food coloring to the white fondant for the roses. To make the roses, I just cut it into a rectangle and roll it. So easy and cute ! xD


I am sooooo happy that they all like it although it was a bit too sweet! Hope that I can make another birthday cake, it's a super exciting thing! ♥

With love,
Julia ♥

Saturday, August 3, 2013

Alfajores

Hello my lovely cookies! ♥


After a long hiatus, I open my blog again! *yayy* Yes, I just open it after this all months. I have been focusing on my assignments and exam, and of course crocheting and all. I found another addicted hobby, cross-stitching! I have so much fun with it and now I can feel that my hands are so itchy to do it again! xD

And guess what, it is another holiday again~! I am having semester break now and trying to enjoy each day as much as possible! Another posts is coming ;)

By the way, I will continue the 5th semester next month. Yup, 2 more semesters to go! I have to try my best to finish this and start to think about my future career, confusing matter indeed, because I have lots of things in mind to do! xD

I write the recipe in Indonesian, so if you're looking for the recipe in English, click here to check the original recipe by Joy of Baking. ;) So here's the recipe for today~


Bahan Dulce de Leche : 

1       liter      susu
150  gram    gula pasir
2       sdm     light corn syrup
1/2   sdt       baking soda
1/8   sdt       garam
1       sdt       vanilla extract


Bahan Shortbread Cookies : 

260  gram   tepung serbaguna (segitiga biru)
1/4   sdt       garam
226  gram   mentega tawar, suhu ruang
60    gram   gula halus / bubuk
1       sdt       vanilla extract


Cara :

Dulce de Leche
1. Tuangkan susu, gula, corn syrup, baking soda, dan garam ke dalam panci 8 liter. Panaskan dengan api sedang hingga mendidih. Perhatikan dengan baik, apabila susu mulai berbusa dan naik, segera aduk dengan spatula tahan panas atau sendok kayu dan kecilkan sedikit api.
2. Terus masak campuran susu tersebut, aduk bagian dasar dan pinggiran panci sampai campuran susu menjadi sangat kental, lengket, dan berwarna karamel (sekitar 40-60 menit). Campuran harus terus diaduk agar campuran susu tidak hangus.
3. Setelah 40-60 menit, Dulce de Leche telah berkurang hingga 300 ml. Angkat dari api dan saring. Masukkan vanilla extract dan aduk. Biarkan dingin sebelum ditutup dan disimpan. Dulce de Leche dapat disimpan di lemari es selama 1 bulan.

Shortbreads
1. Kocok mentega dengan mixer hingga lembut dan putih.
2. Masukkan gula dan kocok hingga rata.
3. Masukkan vanilla extract, aduk.
4. Masukkan tepung dan garam dan campur hingga rata.
5. Bentuk adonan hingga menyerupai piringan, bungkus dengan plastic wrap, dan masukkan ke lemari es paling sedikit 1 jam atau hingga mengeras.
6. Di atas permukaan yang telah ditaburi tepung, giling adonan hingga ketebalan 6cm. Potong dengan cookie cutter bentuk lingkaran berdiameter 5cm (bentuk lain juga boleh, di sini saya menggunakan bentuk hati).
7. Susun di atas loyang dan masukkan  lemari es selama 15menit.
8. Panggang selama 7-10menit dengan suhu 177 derajat C, atau sampai pinggiran cookies kecokelatan.
9. Cookies dapat disimpan selama 1minggu di wadah kedap udara.

Alfajores
1. Oleskan 1 sdt Dulce de Leche di atas permukaan cookie dan tutup dengan cookie lainnya.
2. Taburkan gula halus di atasnya. Dapat disimpan beberapa hari di dalam lemari es.

Untuk 24 Alfajores cookies.
Adapted from JoyofBaking.com


Pretty simple and delicious! The sweetness is just nice and even my non-sweettooth family members love it! Enjoy :D

With love,
Julia ♥

Monday, January 28, 2013

Chocolate Lava Cake

Hi people! ♥

Please do agree with me that chocolate is the best created edible thing in the world! I am oh-so-in-love with this little thing, every dessert with chocolate is just adorably perfect. ♥ So yes, ever since I tried Chocolate Lava Cake in some restaurants and experienced the heaven sensation, of course I won't miss a chance and I decided to bake one. And you should too. ;)

Overall, it is pretty easy to do, you just simply mix everything together. The crucial things here are the baking duration and temperature. Each oven will need different baking time, I even have to bake it several times to get the right texture.

This one is the first batch :


 The surface texture is just perfect, but the inside part is not 'melt' enough.

So I baked another batch for 12 minutes:


You can see the melting chocolate on the surface, but the inside is just perfect!

Actually both are extremely delicious, but I'll just stick to the second one to get more melting chocolate. xD

And here's the recipe. :D

Ingredients
- 100g dark chocolate, cut to small cubes
- 100g unsalted butter, cut to small cube
- 2 eggs
- 50g caster sugar
- 20g self-raising flour

Additional tools needed
- spatula
- electric whisk
- oven safe ramekins (6-8 oz)

Directions
1. Melt dark chocolate and butter using either the microwave or a hot water bath.
2. In a large bowl, use an electric whisk to beat the eggs and sugar till the mixture turns pale and frothy. This will take a few minutes.
3. Pour melted chocolate/butter you prepared in step 1, into the egg mixture prepared in step 2. Stir in the flour. Use a spatula to mix everything evenly.
4. Grease your ramekins with some melted butter (so that the cake will come off cleanly when it is baked). Fill the ramekin almost 3/4 full with the chocolate mixture and bake in a preheated oven of 180C (356F) for about 12 minutes (the recipe calls for 10-11 minutes). The cake is deliberately slightly undercooked so as to achieve its ideal consistency which is runny in the middle (hence the name fondant/molten/chocolate lava) but if you over-bake it, you will get a super moist chocolate cake which is yummy too.
5. When it is baked, remove ramekin from oven and let cool for 1-2 minutes. Use a spoon to gently loosen the edges. Carefully invert the cake onto serving plate.
6. Serving suggestion: Use a sieve to dust icing sugar over the cake. Serve a scoop of vanilla ice cream and some berries at the side.

Adapted from nookbook.com

Happy experimenting! :D

With love,
Julia ♥

Friday, January 25, 2013

Cinnamon Roll

Hello sweeties!

After months of internet connection problem in my apartment, last week they finally fix it! Then you ask me why I update my beloved blog again only after a week? I'll honestly answer, I was very busy with these 4 deadly things :
1. Work in hotel for my internship
2. Work in hotel for my internship
3. Pinning in Pinterest
4. Work in hotel for my internship

Now let me tell you the story of my days...

Warning : I swear this is an absolutely boring story, so I suggest you to skip this and proceed to the link below for the recipe. Thank you.

As I've finished my 3rd semester, I am required to take an internship in a hotel for 3 months. At first, I thought that it will be a very tiring and stressing thing to do, and it is actually TRUE! I leave home early in the morning and reach home late, then eat and sleep and do the same thing over and over again everyday. But now I'm wondering why I feel sad that I've finished 1 month there. Now I want it a bit longer, to laugh and share story with the staffs, smile to the people that I never even know before, do new things and challenged. I think I kind of enjoy all the works that I have to do now... But , oh, how I love off day!

For the rest of my little free time, I'll surely checking the fabulous Pinterest! I can even spend hours, my whole day for it. That site is just so addictive and can sweep away all my burden *i'm serious!*. Just look at those tiny little pictures and please do agree with me!


Talking about sweeping my burden, the smell of cinnamon can also gives joy to me. ♥ That is the reason why I love cinnamon roll soooo much, especially those in Cinnabon. I can't resist the amazing smell of the brown sugar and cinnamon calling for me to buy them... I'm a loser for such things...

I never know that cinnamon roll is a pretty easy yummy thing to do! And lesson learned : 'You will get a funny cinnamon roll shape if you force yourself to bake one full recipe in a tiny little oven'. Luckily, I still managed to save this little one here~ xD

brown sugar + cinnamon = a heavenly smell! ♥

My family loves this as much as I am and I'll definitely bake another batch again! ♥

Recipe from joshuakennon.com. He doesn't have the step-by-step pictures *like I usually prefer*, but he explains it very clearly so it's worth trying! Enjoy ♥

With love,
Julia ♥

;;